Chapter 4: The trip itself
Enough of the planning – time to travel. Keep a camera with you at all times. You never know when something out of the ordinary is going to happen. I remember just arriving in Bhutan and had planned on taking it easy the first afternoon there. Camera back in the room, and no “carry all the time camera with me,” I unexpectedly had the opportunity to meet with a young Rinpoche, a reincarnated lama. And he was fine having his picture taken. It is definitely embedded in my memory, just not on film or memory card. You never know when the photo opportunity will arise. Even a camera phone would have worked.
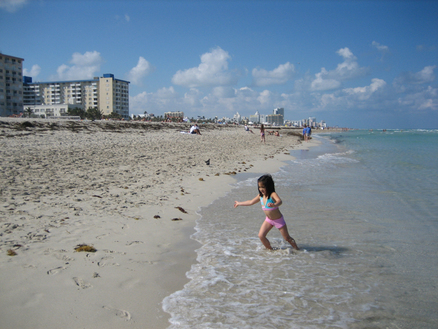
Also remember that you don’t need to take photos of everything. Consider the light, whether you will be somewhere for just a few hours or for a whole week, and pace yourself. Also consider whether it’s a place that you go often or is this a once in a lifetime opportunity? On my first day in India, I shot photos of everything in sight – all new, all vibrant colors, all new and exciting. By the third day, it was clear that the newness, the colors, and the excitement was everywhere you turned and I became much more selective in what and how I photographed, now looking for the best image or the Icon image, not just any image.
The blessing and curse of digital photography is the ability to take LOTS of photographs relatively inexpensively compared to film. During a ten day trip to Japan, I shot 1100 images; a two week family trip to Yellowstone and the Grand Tetons resulted in 1200 images, and on a one week trip to Paris, I took just over 1000 images. India, over 2000 photos; likewise in Ethiopia.
Field Settings
The more familiar you are with your camera before you leave home, the better! It’s not the time to learn how to use your basic camera settings, though I recommend taking your camera manual with you on your trip in case you run into a special situation or if you accidentally hit a button and change a setting and all of your photos come out blue! (If this happens, you probably accidentally changed the White Balance to Tungsten. I’ve done it!)
As you are taking photos of friends and family and even new acquaintances, or of the amazing landscape or the towering edifice before you, there are a few things to consider in terms of camera settings and general camera use. First, check your lens every evening and make sure there are no smudges, dust, etc. ; if you find anything, clean it gently with an eye glass cloth. You should also check your camera batteries to make sure they're fully charged for the next day.
Color versus Other
Always shoot in color, even if you think a certain image would be better in black and white. Modern digital color printers actually use color inks when printing black and white photos and the more information your camera takes in during the moment of image capture, the better your final image will be. It’s very easy to convert color to black and white – and basically impossible the other way around unless you’re a hand coloring expert!
Always shoot in color, even if you think a certain image would be better in black and white. Modern digital color printers actually use color inks when printing black and white photos and the more information your camera takes in during the moment of image capture, the better your final image will be. It’s very easy to convert color to black and white – and basically impossible the other way around unless you’re a hand coloring expert!
Many cameras also allow you to shoot in sepia (brown or golden tones) or with enhanced or diminished color saturation. I highly recommend waiting until you’ve downloaded the original photo files to your computer and make such changes using appropriate software. Having the original full color file will provide you with more options.
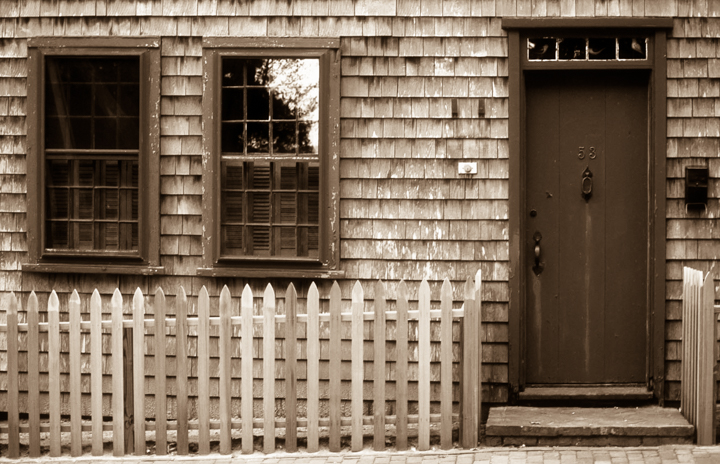
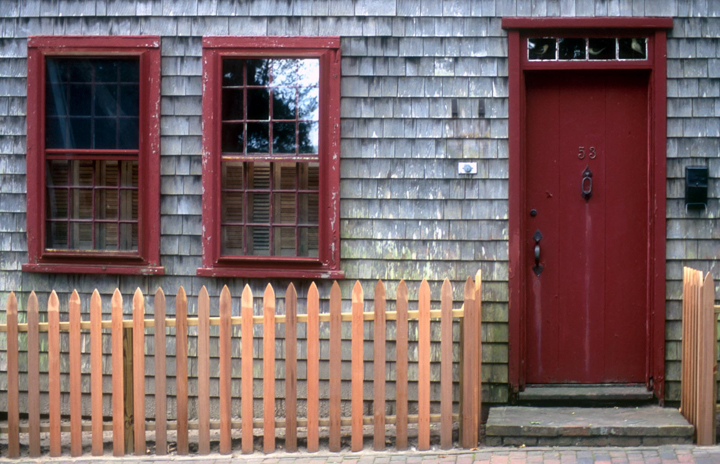
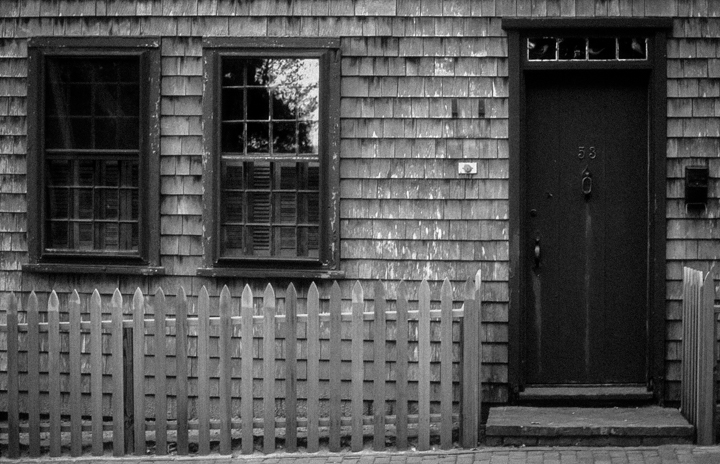
Nantucket Island is famous for its weathered doors and windows. I particularly liked this simple grey washed house with red doors and windows and a wooden picket fence. The color version, as shot, is how I remember it. But in Lightroom, I desaturdated the image, basically creating a black and white version. Finally, using the Sepia preset in Lightroom, with further brightness adjustments, I came up with the Sepia version, which may be my favorite of the three. But, the key is that I did these adjustments using post-
processing software, not in-camera settings.
processing software, not in-camera settings.
File Format
Cameras have a lot of settings that you should give at least some thought to. One of the most basic is whether to shoot in RAW format or JPEG (there are other formats as well, such as TIFF, but the basic decision is usually RAW versus JPEG). Digital cameras sometimes have a “QUAL” button or dial; otherwise the setting is in the Shooting Menu (check you camera’s manual for the precise location and abbreviation). This allows you to set the format – RAW or JPEG for instance. All other things being equal, I shoot in RAW since this setting gathers far more information than a JPEG file, the latter being a compressed file format. You have a lot more flexibility during the editing process when working with a RAW file. The downside is that RAW files use up a lot more memory. RAW files also typically need some tweaking in post-processing.
When shooting indoors or in low light situations, I highly recommend RAW because you don’t need to worry about types of lighting (tungsten, florescent, etc.) while shooting – you can easily adjust for that later; this is not the case with JPEG files. I shoot outdoor photos in RAW as well, for consistency and because, again, you have some more flexibility in the editing process. But if my camera is getting low on memory, I may switch to the highest resolution JPEG setting (“superfine”) to get the maximum amount of information recorded which will more than double the remaining photos that I am able to capture on a given memory card.
“Film” Speed
The ISO setting denotes how sensitive the sensor is to light. A low numbered ISO, such as 100 or 200, is not as sensitive to light as a higher setting, such as 800 or 1600. When shooting outdoors in midday, an ISO setting of 100 or 200 is just fine – plenty of light available with the additional plus of little if any grain. At dawn or dusk, a higher ISO setting – perhaps 400 or 800 - may allow more detail, especially in shadows, to reach to sensor. When lighting is provided by a fireplace or a candle, a high ISO setting is necessary – 1600 or 3200 or even higher – to capture any detail at all. Most point-and–shoots automatically set the ISO; occasionally they allow you to set a “higher ISO” manually, though usually don’t allow setting a specific ISO. DSLRs allow you to set the ISO, with the default usually at 200 or 100 ISO. The downside to a high ISO is graininess. While the sensor is capable of gathering more information in a fire-lit setting, it’s also creates more grain in the image. Some grain can actually improve a photograph, giving it some atmosphere. But a lot of grain can be detrimental, especially if a lower ISO would have achieved the same overall image results. But if the only way to get an image is with a higher ISO, so be it.
Exposure Settings
When you set your camera on program or automatic mode, the in-camera computer chip analyzes the image and determines what it thinks is the best combination of shutter speed and aperture for a given scene. The shutter speed is the amount of time that the shutter is open, allowing light to hit the film or sensor. The aperture is the size of the lens opening and controls how much of an image is in focus. A wide open aperture (f1.4, f1.8 or even 2.8) when focused on a close-in object, will leave much or all of the background out-of-focus, while a closed down aperture, such as f16 or f22, will have nearly everything in focus.
Generally speaking, the program mode is pretty accurate. There are times, though, when the lighting confuses the camera and an under- or over-exposed image is the result. Or there’s motion (blur) when you don’t want it. Here’s where you will want to use aperture priority (to control depth of field – what’s in focus) or shutter-priority (motion or no motion). Nearly all DSLRs and a number of higher-end point-and-shoot cameras allow you to control these exposure settings. To stop action, you want to use a fast shutter speed; to show motion, a slower shutter speed is necessary. (More about this in Chapter 5.)
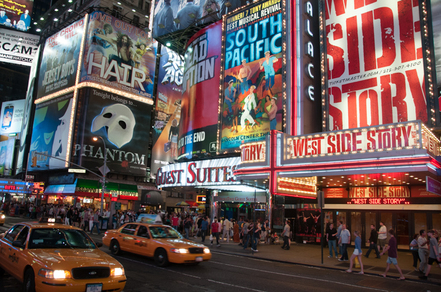
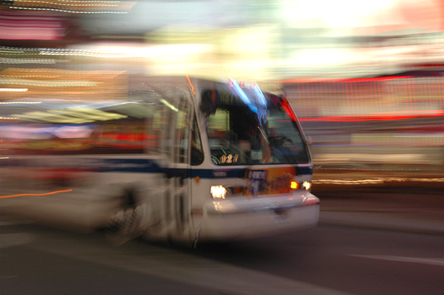
This photo, in New York’s Times Square, was shot at 1/60 of a second, enough to “stop the action” of the taxis and pedestrians, while the following photograph, taken in more or less the same location, was deliberately taken with a slow shutter speed (1/4 of a second) and by panning the camera as I clicked the shutter to emphasize the motion of the bus.
DSLRs also have an exposure compensation setting (+/- button) that allows you to easily over- or under-expose a shot from what the camera is assuming. In outdoor settings, I often set the exposure compensation to -2/3 of a stop, giving a more saturated image, though this can also be done post-processing.
White Balance
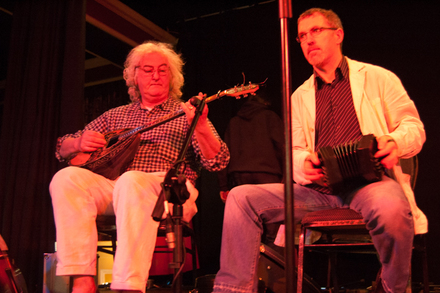
If you’re shooting in RAW (see File Format section above), you don’t need to worry about the White Balance setting (WB on most cameras) – you can easily change it in post-processing. But if you are shooting indoors in JPEG, you may need to pay attention this setting. White Balance allows you to adjust for the type of light, whether daylight, cloudy, flash, florescent, tungsten, etc.) Different types of light have different “color temperatures” that render scenes in colors from blue-white to yellow-red. While your eye corrects for this, film and digital sensors don’t. If you’re not sure what kind of indoor lighting it is, take several shots, changing the white balance between each shot, and see which image looks most natural to your eye. Ah, the wonders of digital! When shooting RAW, you can make the adjustments during post-processing. The photograph to the left was taken during a rehearsal by Noel Hill (concertina) and Alec Finn (bouzouki) in County Kerry, Ireland. The first was as shot – no White Balance adjustments.
If you’re shooting in RAW (see File Format section above), you don’t need to worry about the White Balance setting (WB on most cameras) – you can easily change it in post-processing. But if you are shooting indoors in JPEG, you may need to pay attention this setting. White Balance allows you to adjust for the type of light, whether daylight, cloudy, flash, florescent, tungsten, etc.) Different types of light have different “color temperatures” that render scenes in colors from blue-white to yellow-red. While your eye corrects for this, film and digital sensors don’t. If you’re not sure what kind of indoor lighting it is, take several shots, changing the white balance between each shot, and see which image looks most natural to your eye. Ah, the wonders of digital! When shooting RAW, you can make the adjustments during post-processing. The photograph to the left was taken during a rehearsal by Noel Hill (concertina) and Alec Finn (bouzouki) in County Kerry, Ireland. The first was as shot – no White Balance adjustments.
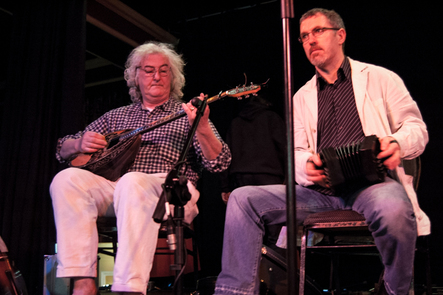
The second version has been adjusted for color temperature and tint to create a more natural look.
A quick reminder that cameras are most easily held in a horizontal format; but you should also see vertically. I have photos of the Eiffel Tower and the Space Needle taken both horizontally and vertically. The same goes for portraits, and landscapes. Try to take verticals whenever possible; it provides more options when putting together scrapbooks or photo books or for framing photos. And should you be lucky and talented enough to get a photo published in a magazine (remember those?!), verticals are ideal for the cover photo!
A photographer needs to be prepared for a number of different situations when traveling. These are the topic of Chapter 5.
A photographer needs to be prepared for a number of different situations when traveling. These are the topic of Chapter 5.
