chapter 9: sharing your photographs
Edit Edit Edit
OK, you’re home, life is adjusting back to semi-normal and you’ve done some basic post-processing and, hopefully, some editing down from 1000 to 500 to 250 to … Even if you only started with 200 or 150 or 100, you still need to edit – down by 50,75, 90% in most cases. If you’re doing a lunchtime “show and tell” at your office, remember that in the old “slideshow” days, a Kodak Carousel held either 80 or 140 slides and one Carousel was usually more than enough. And with today’s shorter attention spans, the fewer, more focused photos, the better. So though I am repeating some from the last chapter, I can’t emphasize enough the need to edit-edit-edit.
Of course, you need to consider your audience and how you plan on sharing your “work.” PowerPoint or Lightroom “slideshows” should certainly be limited to 80-140, and then only if you have enough quality, non-duplicative, photos to justify the number. As I related earlier, I’ve been shown 50 photos of which there may only be 10 different images, with the rest being “oh, these were out-of-focus but I still liked them” types, or vertical and horizontal versions of the same basic shot. If you’re teaching a photo class, OK. If sharing trip photos, focus on the highlights and then your “icon” shots. When sharing prints, 10-20 is probably that maximum range; same goes for “galleries” in various programs, such as Shutterfly or Flickr or … The more concise and thorough you are with your edits, the more appreciative your audience will be and the more likely they are to even look at the photos.
E-Mail
When e-mailing photos, set the resolution to 72 dpi to keep the file size down and set the image size to 5” x 7” or close to that so as not to overwhelming the receiver’s inbox and so that the photo will fit on the receiver’s screen. Photos at this size will not really be printable which will be fine for most folks. You can always send a higher resolution version of specific shots if specially requested by client, friend, or family.
Photo Sharing Sites
With photo-sharing sites, such as Flickr, Shutterfly and Snapfish, follow the guidance given at the site as to proper file size. Some of these sites will automatically adjust the file size downward. Remember to set up any restrictions that you may want prior to uploading your photos – otherwise, anyone may be able to access the photos and use for their own purposes. While this violates copyright laws, enforcement is far from simple and requires first of all that you know that someone is using your photographs. If in doubt, assume that ANY photo you post on ANY website is subject to being used by others without your permission. Resolution and overall file size are the keys to prevent printed use.
When posting photos to the gallery sites, you may want to provide captions – generally easy to do. Some sites also provide the option for “viewers” to provide comments. And in some instances, sites allow you to review such comments prior to posting. I strongly advise this in case of less than scrupulous postings (advertisements, profanity, etc.)
OK, you’re home, life is adjusting back to semi-normal and you’ve done some basic post-processing and, hopefully, some editing down from 1000 to 500 to 250 to … Even if you only started with 200 or 150 or 100, you still need to edit – down by 50,75, 90% in most cases. If you’re doing a lunchtime “show and tell” at your office, remember that in the old “slideshow” days, a Kodak Carousel held either 80 or 140 slides and one Carousel was usually more than enough. And with today’s shorter attention spans, the fewer, more focused photos, the better. So though I am repeating some from the last chapter, I can’t emphasize enough the need to edit-edit-edit.
Of course, you need to consider your audience and how you plan on sharing your “work.” PowerPoint or Lightroom “slideshows” should certainly be limited to 80-140, and then only if you have enough quality, non-duplicative, photos to justify the number. As I related earlier, I’ve been shown 50 photos of which there may only be 10 different images, with the rest being “oh, these were out-of-focus but I still liked them” types, or vertical and horizontal versions of the same basic shot. If you’re teaching a photo class, OK. If sharing trip photos, focus on the highlights and then your “icon” shots. When sharing prints, 10-20 is probably that maximum range; same goes for “galleries” in various programs, such as Shutterfly or Flickr or … The more concise and thorough you are with your edits, the more appreciative your audience will be and the more likely they are to even look at the photos.
When e-mailing photos, set the resolution to 72 dpi to keep the file size down and set the image size to 5” x 7” or close to that so as not to overwhelming the receiver’s inbox and so that the photo will fit on the receiver’s screen. Photos at this size will not really be printable which will be fine for most folks. You can always send a higher resolution version of specific shots if specially requested by client, friend, or family.
Photo Sharing Sites
With photo-sharing sites, such as Flickr, Shutterfly and Snapfish, follow the guidance given at the site as to proper file size. Some of these sites will automatically adjust the file size downward. Remember to set up any restrictions that you may want prior to uploading your photos – otherwise, anyone may be able to access the photos and use for their own purposes. While this violates copyright laws, enforcement is far from simple and requires first of all that you know that someone is using your photographs. If in doubt, assume that ANY photo you post on ANY website is subject to being used by others without your permission. Resolution and overall file size are the keys to prevent printed use.
When posting photos to the gallery sites, you may want to provide captions – generally easy to do. Some sites also provide the option for “viewers” to provide comments. And in some instances, sites allow you to review such comments prior to posting. I strongly advise this in case of less than scrupulous postings (advertisements, profanity, etc.)
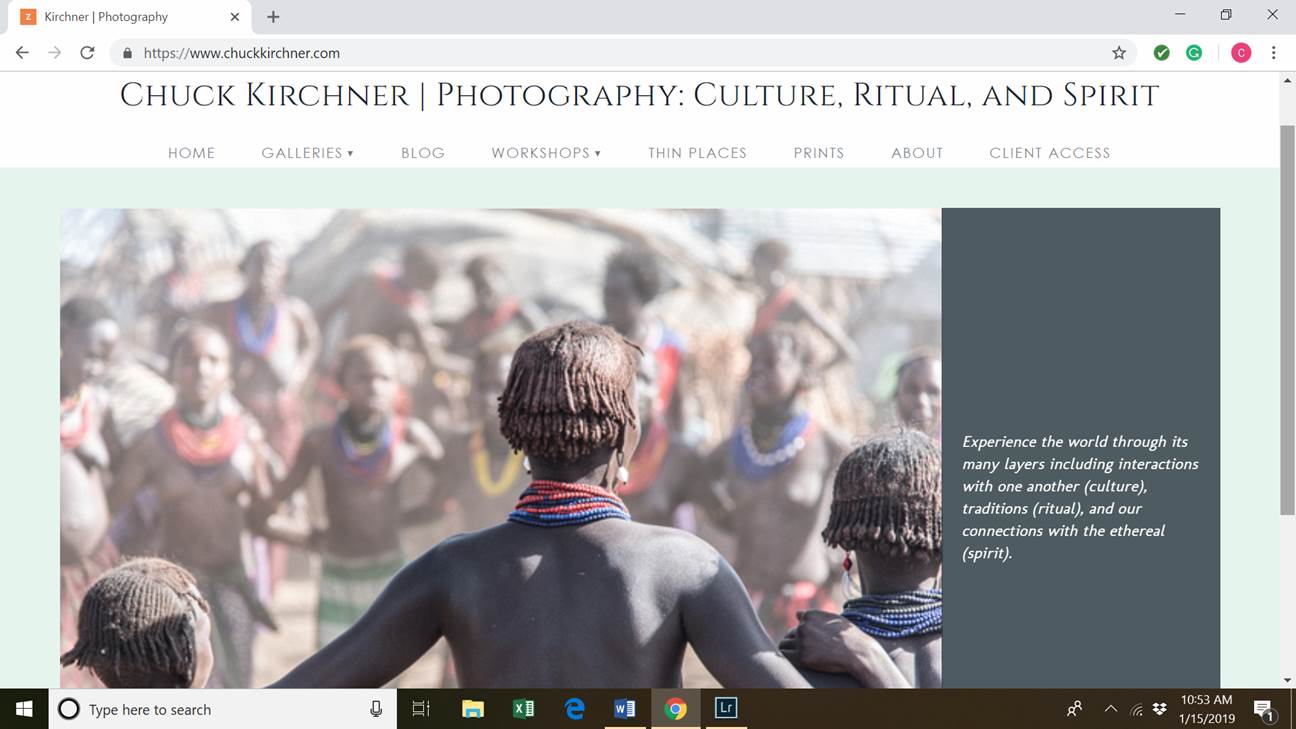
Creating your own website is another option. Your own website gives you much more creative control but also requires more work. My professional photography site uses the Zenfolio interface and includes a blog where periodically post photos or discussions of related topics. (http://www.chuckkirchner.com).
“Slideshows”
Remember slide shows? With the advent of digital imagery, slide shows are just about a thing of the past. While I still have a Carousel projector and hundreds of slides, it’s been years since I’ve used the former or shown the latter. If I use a slide these days, I first scan it into a digital file. So, ultimately it’s really all digital these days.
But, it’s still possible to do “slideshows,” using a variety of software. Microsoft PowerPoint is commonly used and is relatively easy to use if you have familiarity with PowerPoint. Saving your photos as 72 dpi jpeg files, with a maximum width of perhaps 8” will make inserting them into PowerPoint really easy. You can then also include text slides, maps, etc. as separate slides or as overlays on top of photos.
If you use Abode Lightroom, you can also create presentations using their “Slideshow” module. You can then either show the photos directly from the module or save the resulting show as either a PDF file or a movie file. Lightroom also allows you to add music to your presentation and to add features like transitions (fading, overlaps, etc), borders, etc. Note that if you are ultimately going to post your slideshow on the web, music copyrights also come into play; music companies tend to be VERY protective of their songs!
Prints
When making prints for sharing around the office or at gatherings of friends and family, 4”x6” prints are probably the minimum, with 5”x7” ideal. Prints much larger than that raise the cost substantially and are more likely to get bent or creased or have coffee spilled on them. You can either use your own printer or take your disks or memory cards to your drugstore, camera store or the many other businesses that offer on-site printing services. You can also upload and order prints from the many on-line service companies such as Shutterfly or Flickr,
For your “Icon” shots, I urge a little more care. I do all of my own printing (at least up to 13" x 19" inch prints) but I’m also set up for it, using a professional quality, archival printer capable of producing prints with an estimated life of 100+ years. Enlargements by your local photo store or Costco are generally fine if you don’t have your own photo printer. If you are not satisfied with the quality or color saturation of the first enlargement, return it to the store and ask them to reprint it. Another choice is to upload it to a photo printing site, such as MPIX or Bay Photo. These companies tend to do a really nice job of printing enlargements (and smaller size photos as well).
For the icon shots, take your time during the post-processing phase and fine tune the image until you feel it’s just right. I think icon shoots should be printed in at least an 8" x 10" size, with 11" x 15" ideal and, when matted, fit well in a standard and affordable 16" x 20" frame. Nearly all photos taken with digital SLR cameras provide sufficient resolution for an 11" x 15" print. The caveat is if you’ve done sizeable cropping of the image; enlarging it back to 11" x 15" may result in a fuzzy or pixilated image.
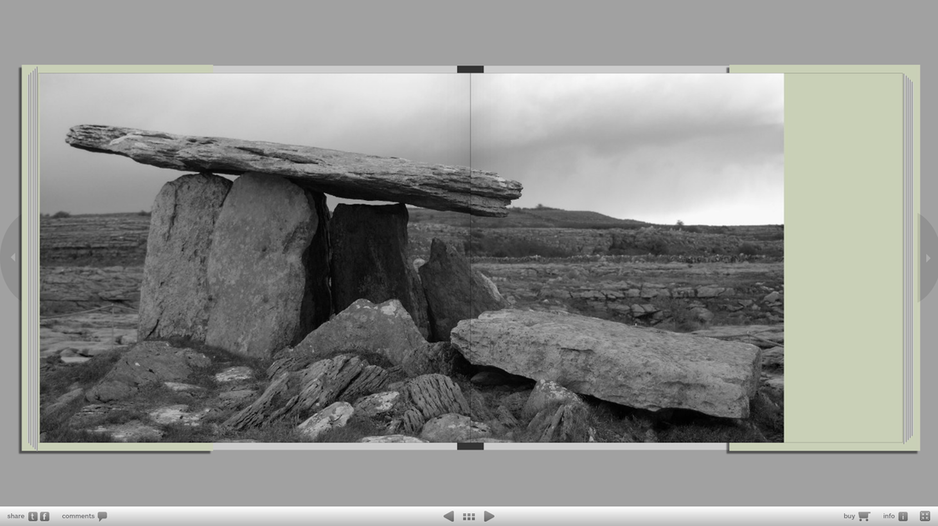
Books
Ever want to be published? Now’s your chance! Self-published photo books have become much easier to make in the last few years. I generally used Blurb to produce a single copy of a book documenting trips to such places as Ireland and Peru. Shutterfly and Snapfish are among other sites that allow you to self-publish your photo book(s).
Remember slide shows? With the advent of digital imagery, slide shows are just about a thing of the past. While I still have a Carousel projector and hundreds of slides, it’s been years since I’ve used the former or shown the latter. If I use a slide these days, I first scan it into a digital file. So, ultimately it’s really all digital these days.
But, it’s still possible to do “slideshows,” using a variety of software. Microsoft PowerPoint is commonly used and is relatively easy to use if you have familiarity with PowerPoint. Saving your photos as 72 dpi jpeg files, with a maximum width of perhaps 8” will make inserting them into PowerPoint really easy. You can then also include text slides, maps, etc. as separate slides or as overlays on top of photos.
If you use Abode Lightroom, you can also create presentations using their “Slideshow” module. You can then either show the photos directly from the module or save the resulting show as either a PDF file or a movie file. Lightroom also allows you to add music to your presentation and to add features like transitions (fading, overlaps, etc), borders, etc. Note that if you are ultimately going to post your slideshow on the web, music copyrights also come into play; music companies tend to be VERY protective of their songs!
Prints
When making prints for sharing around the office or at gatherings of friends and family, 4”x6” prints are probably the minimum, with 5”x7” ideal. Prints much larger than that raise the cost substantially and are more likely to get bent or creased or have coffee spilled on them. You can either use your own printer or take your disks or memory cards to your drugstore, camera store or the many other businesses that offer on-site printing services. You can also upload and order prints from the many on-line service companies such as Shutterfly or Flickr,
For your “Icon” shots, I urge a little more care. I do all of my own printing (at least up to 13" x 19" inch prints) but I’m also set up for it, using a professional quality, archival printer capable of producing prints with an estimated life of 100+ years. Enlargements by your local photo store or Costco are generally fine if you don’t have your own photo printer. If you are not satisfied with the quality or color saturation of the first enlargement, return it to the store and ask them to reprint it. Another choice is to upload it to a photo printing site, such as MPIX or Bay Photo. These companies tend to do a really nice job of printing enlargements (and smaller size photos as well).
For the icon shots, take your time during the post-processing phase and fine tune the image until you feel it’s just right. I think icon shoots should be printed in at least an 8" x 10" size, with 11" x 15" ideal and, when matted, fit well in a standard and affordable 16" x 20" frame. Nearly all photos taken with digital SLR cameras provide sufficient resolution for an 11" x 15" print. The caveat is if you’ve done sizeable cropping of the image; enlarging it back to 11" x 15" may result in a fuzzy or pixilated image.
Books
Ever want to be published? Now’s your chance! Self-published photo books have become much easier to make in the last few years. I generally used Blurb to produce a single copy of a book documenting trips to such places as Ireland and Peru. Shutterfly and Snapfish are among other sites that allow you to self-publish your photo book(s).

Books offer a lot of advantages, the first among them a long-life (digital prints from less expensive home printers can start to fade after only a couple of years). Secondly, you can add text either in the front of the book or throughout the book. Third, it’s really easy to share around the office or when friends and family come over. You can also order extra copies for holiday presents or for your traveling companions. And, yes, you can actually SELL the book if you so desire!
I suggest spending some time in selecting the photos, in the ordering of the photos, and in the placement of photos on the page. Background colors should also be used with care so as not to distract from the photos – I usually go with white, grey or black – and be real careful if you’re thinking about changing the background color on every page; it’s generally best for there to be a consistent background color theme. I highly recommend looking at examples of other people’s books – most of the sites provide access to at least selected pages of other books so that you can get a feel for what works for you and what doesn’t. White space on a page is NOT a bad thing and can be effectively used to “pop” an image. And while full frame images (no borders on at least three of the four sides) are really cool, too many of them, especially in a row, can be too much visually. A final reminded – make sure you’ve done at least some basic post-processing of your photos before uploading into a book format. This is a BOOK after all and your photos should look their very best, even if you’re only producing one copy.
I suggest spending some time in selecting the photos, in the ordering of the photos, and in the placement of photos on the page. Background colors should also be used with care so as not to distract from the photos – I usually go with white, grey or black – and be real careful if you’re thinking about changing the background color on every page; it’s generally best for there to be a consistent background color theme. I highly recommend looking at examples of other people’s books – most of the sites provide access to at least selected pages of other books so that you can get a feel for what works for you and what doesn’t. White space on a page is NOT a bad thing and can be effectively used to “pop” an image. And while full frame images (no borders on at least three of the four sides) are really cool, too many of them, especially in a row, can be too much visually. A final reminded – make sure you’ve done at least some basic post-processing of your photos before uploading into a book format. This is a BOOK after all and your photos should look their very best, even if you’re only producing one copy.